 |
PREVIEW
FM's 1/48 Marcel Dassault
Super MystŔre B2
-----------------------
|
Continuing
their French-made jet series, Fonderie Miniature from France offer the legendary
Marcel Dassault Super MystŔre B2 in injected 1/48 scale.
Long awaited; here it is, and the Fonderie Miniature team showed the kit at last
monthĺs Paris annual modeling meet, and will soon be distributed worldwide (in
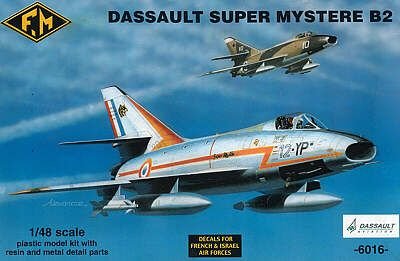
USA by Squadron). The sturdy cardboard box features beautiful artwork showing
both French natural metal and Israeli camouflage aircraft indicate that two
decals will allow a choice. Here we go! Youĺll find six sprues of plastic,
resin and metal parts, a photoetched fret, two vacuformed canopies and one sheet
of decals plus the instructions.
Sprues:
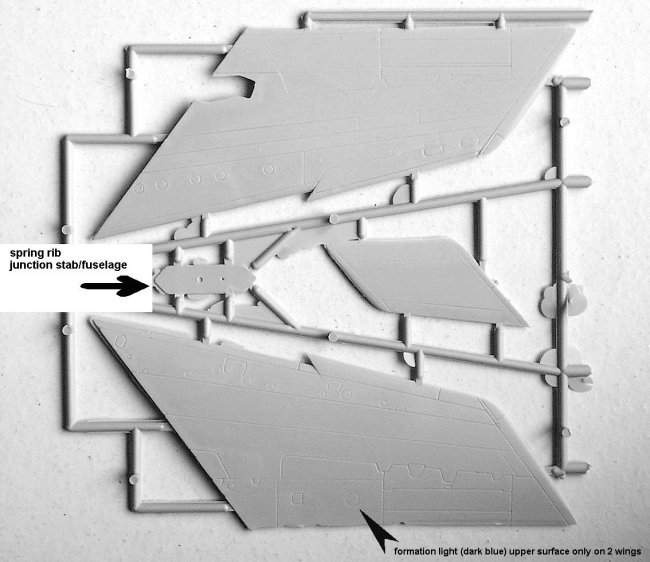
1 The Wings
Each
wing is in 2 pieces, upper and bottom. |
|
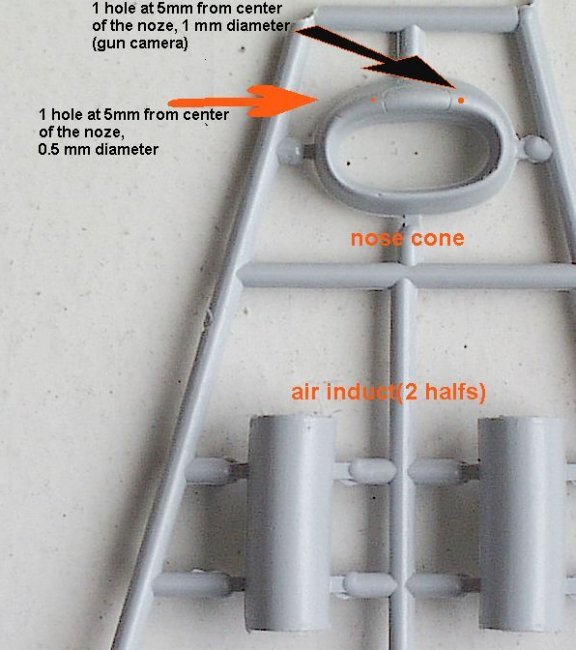
2- The Air Intake
This
tiny sprue carries the front nose air intake, a la F-100 Super Sabre,
which at this time gave the aircraftĺs nickname; "The Little French
Sabre". Seen from above the shape of this item is a little different
than the planview in the instructions that I enlarged to 1/48. The tip of
the Dervaux 168A telemeter extremity is not clearly defined, and the
amount of plastic around it will aid in re-sculpturing, An easy task if
you want to go far in reproducing the 1/1 jet, but check your references
to verify the serial of the bird your building, as the 10 first production
aircraft were equipped with MystŔre IV A instrumentation. |
|
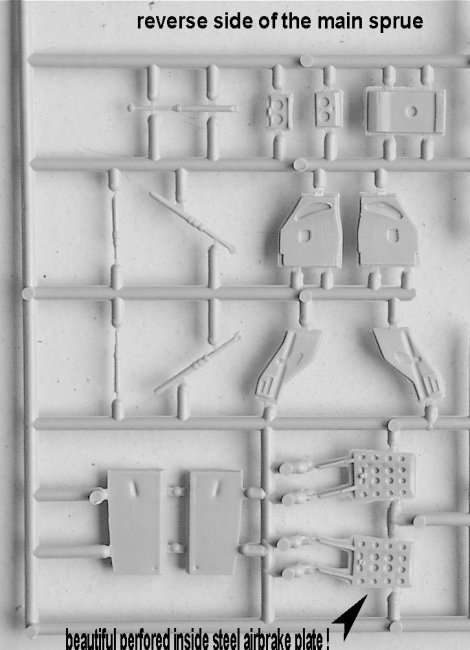
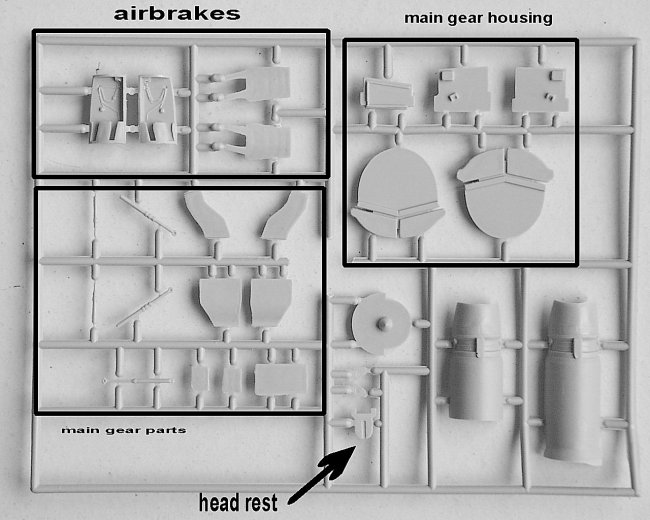
3- the main sprue
Nothing
special to say about it, I SALUTE the good details and the airbrakes' structural
representation (perforated steel plate inside are well rendered (see pics of
reverse sprue), and the hydraulic and electrical lines are well done too!
Cleaning the parts will not take you too much time, due to the softness of
the plastic, which is a standard in the Fonderie "short run" kits. (I
personally clean the fuselage with my nail!) To install the burner ring the
instructions tell you to cut a part of one of the 2 half parts; in my kit it was
already done! Check your kit for this.
|
Click on image below to see larger image |
|
 |
 |
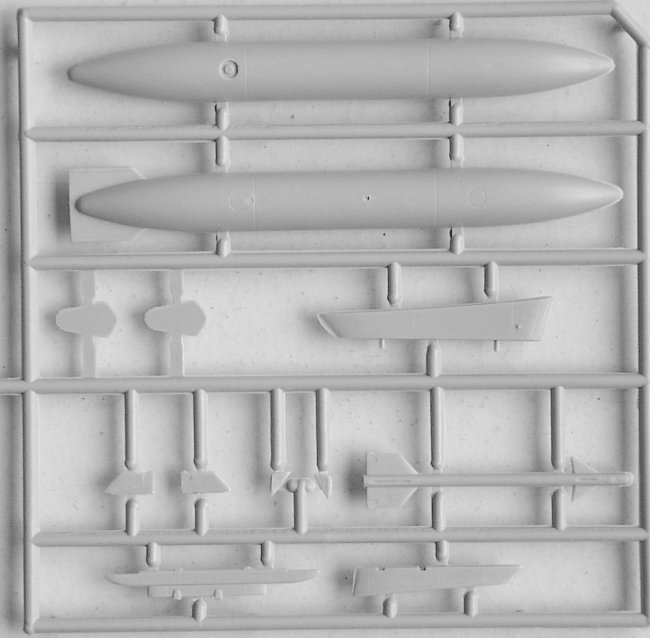
4- fuel tank and sidewinder
The fuel tanks look good and the Sidewinder wings could be replaced with items from your scrap box, or at least sanded.
|
|
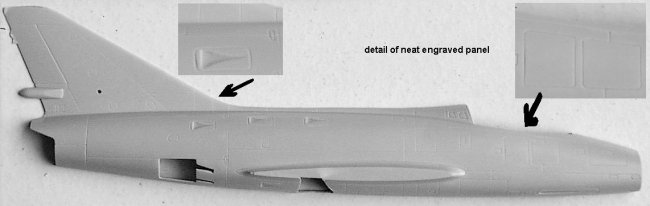
5-Fuselage Halves
| The two parts are very well molded, but as usual, without alignment pins (please Mr. Fonderie, add them, weĺll save time!), but dry fitting does not reveal troubles. Iĺll personally reshape the 3 NACA air scoops on the fuselage, according to references and drill them | ||
| out. The tail exhaust seems a little too long, compared to the enlarged drawing. |
|
|
| Not a problem, it's easier to cut material than to have to add it! In this area the dragchute cone is clearly too long, cut again and glue; Easy. 2 position lights are missing: 1 at the trailing edge near the top, the other between the tail cone and the exhaust. Some vertical vents on cannon bay are missing and can be easily rendered with a new blade cutting at an angle to lift the soft plastic area. Thatĺs all, and that's good. | ||
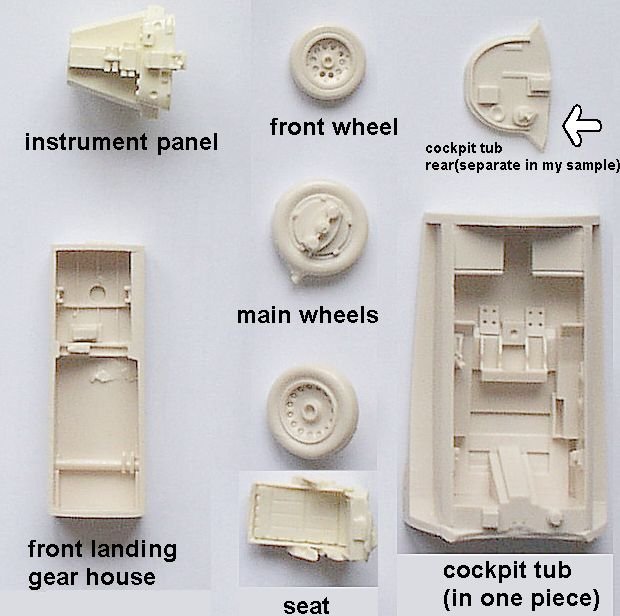
6-Resin Parts
As usual theyĺre perfect, not only in casting but also at gluing stage The cockpit tub doesn't need any sanding and checking before gluing (dry test fitting). You think you have cutting edge items in your hands? Sorry, itĺs French this time and well done! Compliments as well for the main wheels with their exterior MESSIER brake system. Instrument panel coaming is very fine with gun sight molded in. The seat (Republic license-built) will be very convincing with metal back, and p/e harness. Closing the canopy will not do justice to this extra-detailed area.
|
|
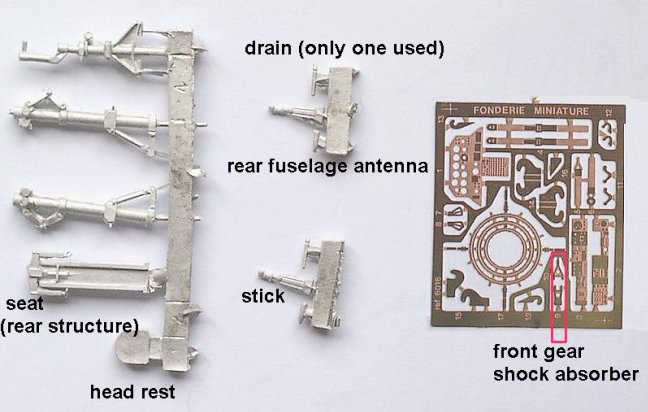
7- Photoetch
Good
fret, I only regret that I have to dig into my reheat decal sheet to fill the
instrument panel! I hope they will take care of this oversight in the future.
You can paint the panel white, followed by a light coat of black over that, and
then scratch with a pin to engrave the dials.
8- Metal parts
The gear legs are beautiful! The troubles I encountered with FMĺs Vautour are only bad memories. Here, they are simple like the real item. You just have to add the brake lines to them (How? Wait Ĺtil the conclusion!) and add the shock absorber p/e on the front leg (see mention on fret pic). |
|
9-Vacuformed canopy
There
are two examples in the box, a good idea in case your blade goes too far. The
profile looks good and transparency could be improved with plastic polish or
dipping in Klear/Future.
Personally, Iĺll represent the canopy opened to see the beautiful cockpit.
Drawings on the instructions show you how to scratchbuild the actuating system
of the canopy (very close to the F-84F) that gives the Super Mystere a very
interesting attitude at rest. . Iĺll also add the two mirrors on the top of
the frame, the grip for the pilot to close the canopy, and the secure grips on
the rails at bottom for closed canopy system.
 |
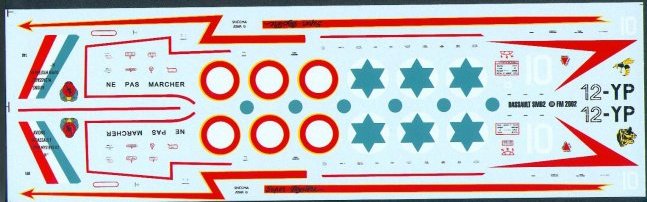
9- the decals
As
mentioned earlier, two options: France and Israel.
Living 30 km from the home base of the 1/12 Escadron CAMBRESIS, I obviously will
mark my bird in this scheme (I was 16 years old when they were retired from
service in the late 70's, and it will represent souvenirs.)
According to my documentation, nothing wrong strikes me on the sheet at first
look, for the Israeli version, I can't tell you any more. The front page of the
instructions indicates a Tiger Meet dress, but I imagine that it could be the
subject of another boxing or aftermarket decals.
 |
For construction , take care with
the anhedral, but the angle is mentioned in the instructions. I will reinforce
the wing/fuselage junction with a homemade plastic plate at right anhedral
inserted in the wing as full-scale structural aviation makers do. After all, we
just work 1/48 smaller!
I HEARTILY RECOMMEND this latest product of
Fonderie Miniature, much IMPROVMENT has been made following their first efforts,
I would at least hope that they also work on their instructions. Why is the fret
numbered, and the references on the drawings arenĺt? Its not a great task to
deliver a very good model, only a little effort! In this way it wonĺt reserve
these kits as "only for collectors" or "pure fanatics of
Aviation".
These are selling fast in France, I just get one and will add 2 others soon; a
bare metal Cornouaille squadron a camouflage Cambresis squadron, and the
beautiful Tiger Meet bird!
For the one who obviously will search for good help and document references,
please wait a little, a complete build up article is in preparation in the top
selling French magazine, REPLIC.
Stay tuned, have fun, and if you canĺt wait, just have a look at www.airliners.net
and NATO Tiger Meet sites, where a
search will find you good pics of this lovely bird.
Jean-Paul