|
Take
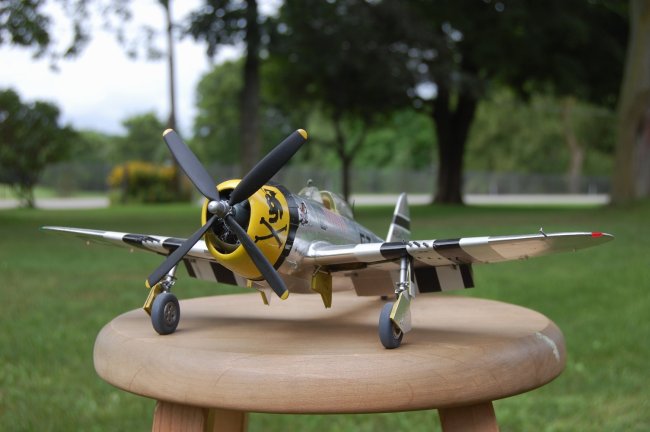
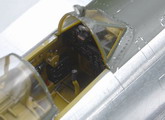
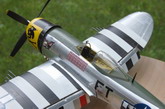
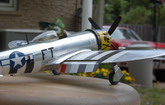
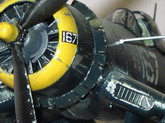
a look at the pictures of this P47-D.
If
you’re saying something like “That’s sweet” or “Man, I’d love to
make one like that” or even “This guy is good”… then you are the person
I have put this article together for. The intention is not to make myself look
good, nor is it to showcase my “talent”. It is quite the opposite.
The
message I want to convey
throughout this article is; I
am NOT an exceptionally talented model builder. When I first came to ARC I glued
models together with the standard tube glue, glued everything together then
brush painted the kits. They looked kind of crappy but I had fun building them.
As I read through the ARC articles and watched builds, I picked up methods that
helped me a great deal… no, let me make that a stronger statement. I went from
building really crummy models to building models people wanted to buy from me.
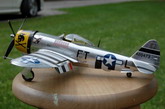
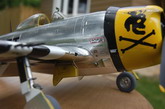
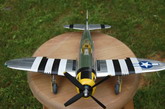
See
photos 03, 04, 05, 06, 07, 08 and 09
Click on
images below to see larger images
|

|
|
|
|
|
|
|
|
Photo
03
|
|
Photo 04 |
|
Photo 05 |
|
Photo 06 |
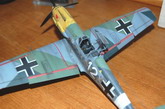
The
first time I displayed a 1/48 scale BF109 at my friends hobby store, he called
me up after a few days to ask me if he could sell it to a guy willing to pay
$200 for it. SELL, SELL, SELL!!!! After I thought about it for awhile I realized
I was making about $5.00 an hour. I love this P47. I think it looks great. It
has inaccuracies and mistakes as well as some just plain sloppy workmanship.
Mostly because I didn’t have the patients to “do it right”, but that
is
my point… the only person that has to be happy with it is me.
Although
I generally don’t take criticism well (unless
of course I’ve asked for a critique),
getting someone’s opinion can
be important to me. Just
don’t criticize for the sake of it - and try to get a nice comment in there
somewhere will ‘ya? I think my attitude
about this started when I use
to have my car in custom autos shows and regardless of the amount of care,
attention to detail,
and hundreds of hours worth of work put into it;
there is always the guy who walks up to it looks for 90 seconds and then says
“there’s a scratch at the bottom of the wheel well on the driver’s
side”. Gee, thanks for noticing that and nothing else. But
I
do take “suggestions”
very well and that’s how I’ve grown and made myself better at this hobby.
I did hesitate
in sending
this article into ARC.
I wasn’t certain my effort would
help anyone else, at least
from a “How to” perspective.
All you really have to do is start following builds in the “In Progress”
forum and then have the desire to build a better kit. Then I thought about all
the picture taking, editing and writing I’ve done. In
fact this has taken me more than a year to put together, so
you’re going to read it damn it.
What
I’m offing you here are some suggestions and a glimpse of one man’s process,
regardless of how good or bad it may be.
For
me,
building models is a surprisingly fulfilling and relaxing pastime. It has the
remarkable ability to take my mind off troubles & aggravations that may be a
part of my normal working day,
but that
wasn't the case when I started. It didn't take long to become discouraged
when I saw the spectacular efforts posted on outstanding websites like this one.
I was certain these people possessed a special talent and insight I could never
hope to acquire…
but it’s *NOT*
true. For the most part it is not a special talent;
it's
really just a matter of someone showing us the tricks. I
will try to show you some of them so I
hope you have the patience to read through this entire article,
and take it in the manner in which it is intended.
Why?
This
question comes up often
in model
building, most predictably when my wife sees the bill from my last trip to the
hobby store. In this case the “Why” was
a result of my taking about
300 pictures of this build. I decided
to document
as best I can
one of my builds. When
I stared this hobby I wished I could find an article detailing a
straight forward build start
to finish. It’s difficult
at first to fathom how people
built such great models.
Instead, I would find articles written by a person that spent 6 months building
an amazing plane. It’s tough when I read an article and I get to the part
where the guy says “I turned a new landing gear in 1/48th
scale on my home lathe, using a copy of the original blueprints published by
Boeing Aircraft”. Hmmm, that’s great, but it doesn’t help me that much
considering the fact I’ve made a wheel out of clay, molding it with just my
fingers, because I lost the original,
not
a good wheel either. That's
not what I needed. I needed an out-of-the-box build using things I could relate
to. I also should point out
this one fact; for me
almost all the enjoyment of
this hobby, is in the building process.
See
photos 11 and 12
Declaration.
I
build models because I love building models; that’s first everything else is
second. I like them to look realistic but they do not have to
be
realistic. What does that mean? It means if it looks good to me then it's ok.
I’ve have made
or tried to make exact replicas, getting the detail as accurate as I can.
Usually these are commission builds and I feel an obligation to make them
“right”. These are never (no really, NEVER) fun builds for me. They also
tend to be the projects I work on for a week or so then put down for a month,
then go back for a week or so, then put them down for a month… so on, and so
on.
Can
I be as good as this guy?
Let’s quash that myth right here
and now. You do not
need to possess the patience of a saint, artistic talent, steady hands or small
fingers to build a great looking kit. What you need is some instruction.
Granted, if you have patience, artistic talent, steady hands and small fingers,
the learning curve is somewhat reduced but you still need a voice of experience.
See
photo 13
It’s
not magic and it’s not something you have to be born with. You can learn the
tricks & skills that make a good builder. The funny thing is most of
what’s required is not really talent
by my definition but methods
or processes
if you will, that produce very good results. ARC is an endless, selfless source
of information and assistance regarding these…
use it. In this article I show how
to do some things, however, I restricted writing about
every
way to do something due to the fact - I don’t know every way. Even when I
start talking about cut things off the sprues, I just give you one or two
options on the common methods I use. I don’t mention sawing them off, melting
them off, and probably one or two others I’ve forgotten about. If you think of
a good way, then use it.
If you’ve seen a magician do an
amazing trick and then at the end disclose the secret of it, then you’ve felt
that “Oh, it’s so easy when you know how” feeling. The interesting part is
how impressed you were with the trick
initially, and then with the
secret disclosed its oh
yea… *yawn* nice trick. A great looking model can be like that. You’re
impressed by
the quality, detail and ‘realism’ of it yet once you learn how easy it
really is,
you become as embittered and unimpressed by it as the rest of us (ok, that was a
joke, no emails please).
When
I started building I spent a lot of time trying to figure out how someone
accomplished the finished product. Reading their
description of the process didn’t
necessarily help me.
I was mystified at how builders manage to paint and weather stuff already built.
I also had no idea how they painted half the stuff. Their articles say “Then
paint and weather the… ". Nice. But how the hell do you paint and weather
it?! What do I use?!
I’m
going to try to show you the
build from beginning to end.
I hope to take you through the
process without skipping crucial elements,
but let’s be reasonable about this; I can’t possibly document every
conceivable step but I will try to provide more than enough to
give you the idea. If you
still can’t figure it out after reading this,
well then… maybe you should consider gardening instead. It’s a good hobby
too (another joke, No emails please). I did forget to take a few photos during
the build but nothing critical was missed, I apologize for that. Also quite
frankly, by the time I was ¾ of the way through this I was already sick of
documenting it! I don’t know how some of you guys have the patience for
documenting a build. In the end, I sort of gave up trying to keep everything in
chronological order for this article so even though it may jump around a little
bit I think you’ll be able to follow what I’ve done fairly easily.
See
photo 14
Just
Beginning?
You have to like building these
things and the easiest way to like building them, is to choose a subject you
love. So my first piece of advice; don’t build airplanes if they don’t
interest you. The great thing about this hobby is that you can build anything.
Cars, planes, figures, boats, motorcycles rockets, monsters, buildings,
anything. Hopefully you’ll acquire some of the tools and other things
suggested in this article and then build, build, build. If you’re just
starting out I suggest this; buy a model plane (hey, that’s what I do…
airplanes), any aircraft that interests you. Buy two of the same plane. Build
one now the best you can then put it away. Then after you’ve gained some
experience with the help of all the friendly people on the ARC website, go back
after a year and build that same aircraft again. Compare it to the first one.
Who
am I and why should you listen to me?
Some
builders are “professional” model builders. Me, I’m just a regular model
builder guy (whatever that is), a family man, sincere, simple, trustworthy. Not
at all like those evil “professional” guys. They worry about a lot of things
during a build. I love to build and the last thing I really want is to fret over
every detail. Worrying about detail can consume you if you let it and for me,
really start to take away from the enjoyment of the hobby. My secret is to
build for those that can’t or don’t. You’re not competing with anyone and
all you ever hear is praise; “You’re amazing”, “This is incredible”,
“How do you do it?”, “I could never do this”. You can say “Thank
you, thank you. Yes it’s true; I am somewhat God-like”.
You
see the secret is in knowing how easy it really is; although I don’t think I
could ever build a kit as well as some of the other regulars on ARC regardless
of how hard I try. Not because I don’t have the skills, but because I don’t
have the desire
to regularly put myself through the painstaking task of perfection every single
time I try to build a kit. Desire is an important part of inspiration and if you
lose the desire you lose the inspiration, and ultimately the enjoyment.
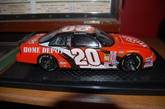
I’m
not one of those that collect kits either. Of all the kits I’ve built I‘ve
never kept one, I give them all away. There is not a single completed airplane
model on display in my house. I have only one model on display. A 1/25th scale
version of Tony Stewart’s NASCAR built for my wife, so it belongs to her
(along with everything else in the house). Like I said earlier, for me all the
satisfaction of this hobby is in the building process and in the joy on the
recipients face. I must confess that the praise I receive from the person does
tend to boost the ego as well, but that’s just me.
See
photos 15 and 16
In
essence there are two sets of eyes looking at a finished kit. The eyes of
another builder (those can be very tough), and the eyes of admirers. Since my
focus is on the later, factual realism is not my primary concern. The model has
to look good and most of the ‘look good’ part comes from three things;
-
(A)
Neat assembly,
-
(B)
Paints,
-
(C)
Weathering.
You
could argue that ‘detail’ should be one of those factors. My experience has
been if the kit has the look of realism (mostly accomplished through weathering)
then detail is really secondary. No one I know outside of the hobby would notice
if I used the wrong shade of Interior Green or made up a completely fictitious
gun sight for a Mustang. Mostly because they’re too busy trying to figure out
how I painted each of those little cockpit buttons and gauges different colours.
What you learn are the techniques and those techniques can be used to build
whatever you like. Some of the skills transfer nicely to other things; I learnt
to airbrush so I could build models with the look I thought they should have.
Consequently, I painted flames on my lawn tractor, the wife’s kitchen blender,
and my kid’s catcher’s mask, all because I learnt how to airbrush. I figured
out how to hide the seams on a model and used that skill to restore a
traditional family Santa whose porcelain face got smashed.
So
who is this for?
This
article has been written with the beginner in mind. That could be the budding
youth with no money as well as the mid-life crisis male with lots of it. (Just
not a lot of female WW2 model builders. I know there are some, but few and far
between). It’s also for those who have never had instruction other than those
included in the kit box. You’ll see my standard methods used during this build
and although others may not be the most giving of people… I on the other hand,
am very giving. Willingly sharing knowledge to enable you to become… well,
better than you currently are.
What
kind of model and what level of quality and detail?
There is a saying among modelers,
“There are no bad kits, just bad builders” …yea, right. There are plenty
of bad kits. My suggestion is to stay away from them initially. Look, your just
starting out right? Well, let’s not make it any more frustrating than it needs
to be. I want you to save up your money and go buy a good kit. Trying to glue
two poorly designed, poorly made pieces together can really take the joy out of
building, particularly if you don’t know how to fix the problem. If you
don’t know what a good kit is, just pose the question on ARC’s forum.
Rivet
counter! Rivet counter!
Rivet counter is a term applied to
some builders in part due to their dedication to authenticity for every build.
They can, and probably will be the first to point out what is wrong with any
kit. If you let them, rivet counters could drive you insane. I’m somewhat
surprised a modeler somewhere hasn’t just lost it at a hobby show as some guy
points out. …“I’m sorry to inform you that the ARCON 250b antenna wire
wasn’t installed until August of 1942. This is clearly a May ’42 version of
the aircraft. Therefore, the attachment point should be a ring hook rivet, not a
ring hook screw.”
See
photos 17 and 18
I
really have nothing but praise for their knowledge of the subject matter, but I
just build them so they look good to me. I can only think of a few reasons to
agonize over such details. Every modeller at some point would like to build an
exact replica just to say he’s done it or if you’re building to compete with
other modellers. Try to not let detail consume you unless you want it to, and
try not to take the comments RC’s may give you, the wrong way. Rarely in this
hobby is advice or comment given, meant to be critical or sarcastic.
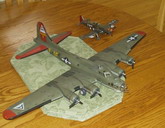
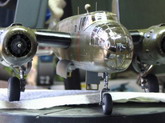
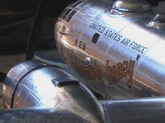
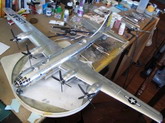
I
built a Monogram 1/48 scale B29 and posted the article on ARC, It was my first
“all foil" job. I built it for a friend of mine in Alberta, Wes. Wes
loves WW2 aircraft and I have built several for him. This aircraft is huge in
real life and in model form. I decided to throw a bunch of rivets on it with the
help of a pounce wheel because no rivets were moulded into the kit. The rivets
aren’t in the right spots, not uniformly applied and the wrong distance apart.
Some people may have a fit at how ‘totally wrong’ it is. I think it looks
pretty good and that’s the point I’m going to keep driving into you... this
hobby is about your
satisfaction.
Lingo,
details, steps, and size does matter.
Scale:
1/72, 1/48, 1/32, 1/24, 1/16 and on, and on. Size does matter. The amount of
time you spend on a kit can be directly proportional to the size of the kit. In
regards to aircraft… 1/72 = small, less detail, less parts to worry about;
1/48 bigger and arguably the most popular size with a great level of detail
possible. 1/32, be prepared for lots’ a parts.
Many
times but not always, the larger the scale the more parts and detail you have.
The more parts and detail you have, the longer it’s going to take to finish.
If you get board easily give size some serious consideration. Another thing
concerning size; most of the aftermarket products tend to be aimed at the 1/48
scale marketplace. If that’s not true then let me say that at least in my
experience, most model stores carry a majority of 1/48 stuff. That works for me
because I plug away mostly with 1/48 scale. That size doesn’t take long to
build and usually has enough detail to
get fiddly about, if you want to (“fiddly” is a technical modeling term).
Some
of the words you’ll hear … sprues, flash, vacuum form or vac-form, photo
etch, decals. Scribe, OOB, scratch built, BMF, pin vice, template, punch. I’ll
try to remember to explain them as we go along. You’ll see the order in which
I built this model. This is not necessarily the order I always use, and
doesn’t have to be the order you use.
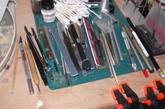
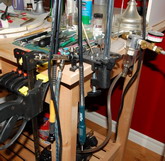
Tools
and other things to hurt yourself with.
See
photos 19, 20 and 21
This
has got to be the most subjective part. What do you need to build a model? Makes
me laugh when I read the side of the kit box and it usually says something like
“Tools required: Glue, art knife, paint” Right! You’ll need some other
things too. This picture shows just the glue I use.
See
photo 22
The
facts are; everything is a tool. My wife considers a can of peas to be an
excellent hammer. My daughter considers me to be quite the tool as well. When
with a look of pride on my face I show her the model I just spent 4 pain staking
hours (accurately) riveting by hand, she comments that I had to have a drink to
get through a half hour of teaching her how to drive because when I talk to her
in the car, it “makes her crash”.
There
are so many things you can use in the model building process it would be
impossible to list them all. The reality is; all you really need to build a
model is an art knife, paint, glue, brush, and a place to build it. It’s
probably going to look like crap, but it will be built. So maybe the question
should be “To build a model really well, what do I need?” This is difficult
to answer in less than 100 pages. I decided the easiest way to cover these items
was to take photos of my workbench and explain some of the things seen in the
photos. I’ll try to give you an expanded explanation about some of the tools
so you have clearer ideas on its use, of course as you get more and more
involved (dragged into the Dark Side may be another way of describing it), you
will never go to the hardware, electrical, art, or tool stores again without
saying “Hey, I think I can use that...”
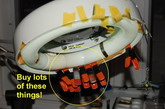
There
are no limits to the amount of tools you can utilize. You will collect things by
the dozen. Some you’ll use, some you think you’ll use. I’m going to limit
it to what I believe are really the essential things, and since you’re still
reading this, I assume you are serious about building a better kit and you
intend to build many of them. Therefore, get the tools that make the job easier.
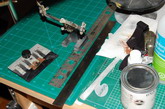
See
photos 23, 24 and 25
Just
to give you a little taste, here is a paragraph I borrowed from something else I
wrote awhile back. I thought I’d include it here so you know at what point you
can call yourself “committed”. Keep in mind that this just scratches the
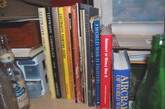
surface. After dozens maybe hundreds, of
models and hundreds if not thousands of dollars later, here is some
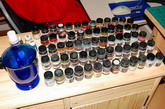
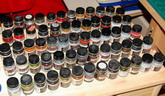
of the stuff on my bench:
60
bottles of paint, 4 kinds of thinners, 7 different types of glue, 3 lamps (one
with the magnifier built in), 6 or 7 kinds of tape, 6 art knives with 3
different kinds of blades. 2 airbrushes, 1 compressor, 4 types of finishes -
flat, semi-gloss, gloss and metalizer, 8 grades of sandpaper, several version of
nail files and buffers, clamps, vices, pencils, markers, enough small metal
tools for do-it-yourself Dentistry. Enough pastel chalk to sketch a wall size
mural, 2 mixing trays (one for paint, one for chalk), about 15 distinctly
different paint brushes, small rubber hoses, wire, 3 different shades of thread,
two kinds of toothpicks - the flat ones and the round ones, pipe cleaners, jars,
two contraptions to hold pieces of models. 3 kinds of putty, Blue Tac,
plastercine, cutting board, scissors, lazy Susan (invaluable for painting by the
way), 5 - ¼ ounce paint cups, a dozen books ranging from "How to
Airbrush" to "Rare Squadron Markings of the Luftwaffe"
See
photos 26, 27 and 28
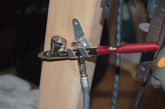
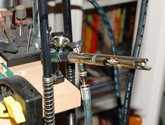
Let’s
start with a controversial item; the airbrush.
No,
you don’t need an airbrush to paint a model. You just need an airbrush to make
it look the best it can. You can if you like, hand paint it and get a pretty
good looking kit. It will never look as good as an airbrushed one does (more
angry emails coming my way now), but I understand your apprehension. Maybe it
will help if I point out a few things.
-
(a)
You do not need to be an artist or
possess artist talent to use an airbrush successfully.
-
(b)
They are not really that expensive
-
(c)
It is easy to learn and use
-
(d)
I’ll bet you’ll be happy with
the results
-
(e)
They are not messy
-
(f)
They clean fairly easy
The
most important thing to come to grips with is; you
do not need to be an artist or possess artist talent to use an airbrush
successfully. It is just
another tool in your toolbox, sitting there with your hammer and screwdriver or
in this case your art knife and glue. I am not an artist but this doesn’t
hinder my ability to airbrush a model.
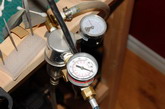
If
you have made the commitment to build then make the commitment to buy an
airbrush. I recommend gravity fed dual action. There are going to be a lot of
different opinions on this and you can make your own choice. Mine is dual
action, gravity fed and I say that’s what you should get because I know more
than you do. You can get a decent one for $100 or less of course now you need to
buy a compressor. This is another story, cheap one $50 - $100. Good one, around
$250-$300. Save, save, save. They are worth it in the long run. If you plan on
buying canned propellant to power your airbrush for the first few uses - well
that I can understand. After that, if you are not saving for a compressor then
you are a foolish. Canned propellant is outrageously expensive, provides no
control, and will run out at exactly the worst possible time. Compressor… FREE
AIR, on-going, unrestricted, adjustable FREE air. FREE air means cleaning your
airbrush in 2 minutes.
If
you’re a kid and $100 may as well be a million, tell your parents that by
purchasing an airbrush for you they are encouraging the growth of your artistic
abilities and giving a forum to express your innermost feelings (baby-boomer
parents love that stuff), and you will spend more time quietly working away on
your kits all the time building dexterity, the ability to read and follow
instructions, learning about history and developing skills that will in the
future, help you fabricate things that may save them money. Not only that... you
can spray abs or a tan on mom and dad.
See
photos 29, 30 and 31
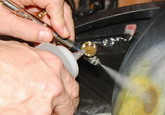
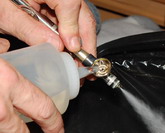
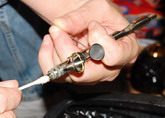
Since
we’re talking about it, I may as well show you my airbrush cleaning process.
This is fast and works well. I still give it a more thorough clean every month
or so but this is a good daily process. Please don’t give me grief about this.
Someone is going to say “the fumes...”, “the danger of spraying it the
garbage” etc. etc. You can do it anyway you want, this is just how I
tend to do it. If it’s going to be a quick clean, I don’t even put on my
mask.
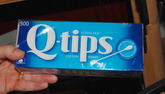
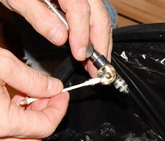
First
thing is the Q-Tip. My suggestion is stick with this brand. The cheap ones are
going to cause you grief in the end.
See
photos 32, 33 and 34
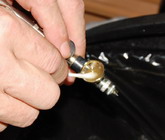
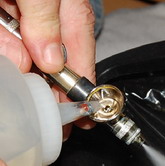
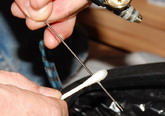
I
fill the cup of the airbrush with thinner while spraying into my garbage can.
Use a Q-Tip soaked in thinner to wipe in and around the bowl. Use your thinner
and spray it through again. Take another and wipe around the bowl again. Spray
thinner through again. Pull the needle wipe with Q-Tip, wipe the end of the
airbrush… done. Put the airbrush back together and run some nail polish
remover through. Cleans it out and leaves a very nice scent!
See
photos 35, 36, 37, 38, 39, 40, 41, 42, 43 and 44
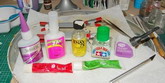
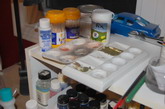
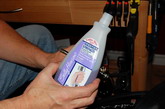
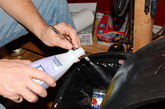
Paint
I
use three types, enamels, acrylics and water colours. My problem with acrylics
is they tend to be much more difficult to use, no wait… they ARE much more
difficult to use (more email for Larry). They start drying on the end of your
airbrush while spraying, creating a wonderful yogurt concoction. Also once dry
they can be very hard to remove. That’s ok on a model but not so good for the
inside of an airbrush. Folks will write in to say “just add a few drops of
alcohol, distilled water, thinner, stabilizer, enhancer, cleaner, etc. etc.”
and “you’ll have no problems”. I’ve been on the ARC website for a long
time and I can tell you with confidence that if you search for all the articles
about “How do I solve my acrylics and airbrushing problem” you’d be
reading for a week straight, and still not really know the answer. What I do
like about acrylics is the fact they tend to cover much better especially if you
are using a brush to paint by hand, much more opaque. I find the prep work has
to be much better as well with acrylics or the possibility of the paint coming
off with your masking, is pretty real.
With
enamels the cleanup is easy and they dry quickly on the model even though I can
sit with a cup of paint in my airbrush, re-mask an area for 5 minutes then pick
up the airbrush and continue, very difficult to do with most acrylics. Sure,
enamels smell a bit but the fumes aren’t that bad as far as I’m concerned.
I’ve been breathing them in for years and it’s
no effect it no had mind me.
You will lessen your grief factor substantially if you just start out with
enamels. I haven’t given up on acrylics though; I just have to figure them out
when I have time.
One
more thing, I don't like to mix paint. There are 10 shades of any colour you
want. If the kit calls for a green you have to mix, I guarantee M&M has a
green so close I defy anyone to tell the difference. I never mix paint, period.
There is no practical reason to do that other than to mix a color you don’t
have. If you have black paint and white paint, but you need some grey, or blue
and yellow paint but you need green… well then mix away, outside of that just
buy the colour.
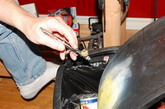
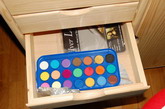
Water
colours come in very handy for dirty-ing up and weathering, also very forgiving
if you make a mistake.
See
photos 45 and 46
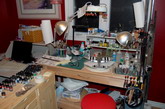
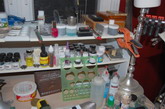
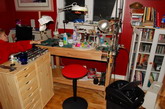
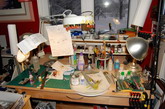
Workbench:
Clearly,
a pristine work environment is a sign of mental illness.
See photos 47 and
48
Some
of the fun of making models is saying “Where the hell did I put the …”
then rummaging through piles of stuff scattered about the workspace and room all
the while muttering “I just saw it the other day” or the famous “I just
had it in my hand!”...I’m kidding, but just a little.
I
want my work area somewhat clean and organized but I still want it to look like
stuff gets accomplished there. Also, it’s very annoying to have to worry about
every mark or spill that takes place. It’s a WORK area where glue, putty,
cleaners, paints, sanding, and many other messy things are used and
accomplished. You can fight the mess or… you can embrace it! Don’t get me
wrong organized is good, clean is good. Just don’t drive yourself crazy over
it. If you don’t want to work on a model because you don’t feel like
having to clean it all up when you’re done” then this takes away from the
joy of the hobby.
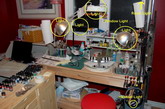
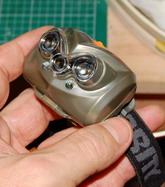
Don’t skimp on the lighting:
Basically,
unless you’re experiencing retina damage or parts are melting from the heat,
the more light the better. If you don’t already think I’m crazy you will
after this… here is a list of my light sources:
-
1)
Window right in front of me
-
2)
Overhead room light
-
3)
2 spot lights, each with two levels
of lighting
-
4)
1 desk lamp
-
5)
Lighted magnifier lens
-
6)
An LED headset with 3 LED lights in
it
-
7)
A handheld flexible pen light
Let
there be light! Trust me on this one.
See photos 49, 50
and 51
Click here to
download a 6 part PDF file of this article
12Meg file
Larry Shred
Click on
images below to see larger images
|
|
|
|
|
|
|
|
|
Photo 07 |
|
Photo 08
|
|
Photo 09 |
|
Photo 10 |
|
|
|
.
|
|
|
|
|
|
|
|
|
|
|
|
|
|
Photo 11 |
|
Photo 12 |
|
Photo 13 |
|
Photo 14 |
|
|
|
. |
|
|
|
|
|
|
|
|
|
|
|
|
|
Photo 15 |
|
Photo 16 |
|
Photo 17 |
|
Photo 18 |
|
|
|
. |
|
|
|
|
|
|
|
|
|
|
|
|
|
Photo 19 |
|
Photo 20 |
|
Photo 21 |
|
Photo 22 |
|
|
|
. |
|
|
|
|
|
|
|
|
|

|
|
|
|
Photo 23 |
|
Photo 24 |
|
Photo 25 |
|
Photo 26 |
|
|
|
. |
|
|
|
|
|

|
|
|
|
|
|
|
|
Photo 27 |
|
Photo 28 |
|
Photo 29 |
|
Photo 30 |
|
|
|
. |
|
|
|
|
|
|
|
|
|
|
|
|
|
Photo 31 |
|
Photo 32 |
|
Photo 33 |
|
Photo 34 |
|
|
|
. |
|
|
|
|
|
|
|
|
|
|
|
|
|
Photo 35 |
|
Photo 36 |
|
Photo 37 |
|
Photo 38 |
|
|
|
. |
|
|
|
|
|
|
|
|
|
|
|
|
|
Photo 39 |
|
Photo 40 |
|
Photo 41 |
|
Photo 42 |
|
|
|
. |
|
|
|
|
|
|
|
|
|
|
|
|
|
Photo 43 |
|
Photo 44 |
|
Photo 45 |
|
Photo 46 |
|
|
|
. |
|
|
|
|
|
|
|
|
|
|
|
|
|
Photo 47 |
|
Photo 48 |
|
Photo 49 |
|
Photo 50 |
|
|
|
. |
|
|
|
|
|
|
|
Photo
51 |
|
|